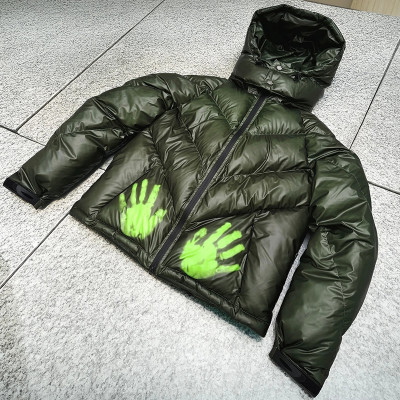
Custom Logo Down Jacket Manufacturing
Custom Logo Down Jacket Manufacturing: Choosing the Right Decoration Technique
Custom logo down jacket manufacturing is the process of applying your brand mark to a quilted, down-filled garment in a way that survives compression, laundering and daily wear without damaging the loft that makes the jacket warm. The four production-ready techniques are embroidery, heat transfer, screen printing and 3D silicone or rubber branding. Each one behaves differently on a down-filled panel, costs differently at low volume, and requires a different point in the production line. This guide explains how each technique is actually manufactured at factory level, what it costs, how it is tested, and how to choose between them for your first or next down jacket program.
Table of Contents
- What Logo Manufacturing Involves
- Why Down Panels Change the Rules
- The Four Techniques Compared
- Embroidery Manufacturing Rules
- Heat Transfer and Screen Printing
- 3D Silicone and Rubber Branding
- Durability Testing and QC
- Cost Model and Break-Even
- Production Sequencing
- Placement Engineering
- Defects and Prevention
- Frequently Asked Questions
What Custom Logo Down Jacket Manufacturing Actually Involves
Logo manufacturing is not a single operation. It is a chain of five controlled steps that sit inside the wider down jacket production schedule: artwork conversion, decoration tooling or programming, surface preparation, application, and post-application inspection. A factory that treats logo work as an afterthought will produce logos that crack after two washes or that compress the down channel underneath until the panel looks flat in photographs.
At Ginwen Wear, logo work is planned at the same stage as baffle layout and fill weight, not after the jacket is sewn. That matters because a 30 cm embroidery block placed over a horizontal baffle line changes how the panel sits on the body, and a heat transfer applied across a stitch line will lift at the seam. Planning the decoration at sampling stage removes almost all of the rework that brands otherwise pay for.
The five steps run like this:
- Artwork conversion. Vector art is converted to a stitch file (DST or EMB) for embroidery, separated into spot colours for screen printing, or turned into a die-cut outline for silicone and rubber.
- Tooling and programming. Embroidery heads are programmed for stitch count and underlay, silicone requires a mould, heat transfer requires a print plate.
- Surface preparation. The decoration zone is marked on the cut panel or assembled shell, and any DWR finish or coating that would block adhesion is identified.
- Application. The technique is applied either flat on cut panels or on the assembled garment, depending on the technique and the position.
- Inspection. Registration, edge definition, adhesion and loft recovery are checked against the approved sample.
According to our standard down jacket program, MOQ starts at 50 pieces per style, sampling takes 7 to 14 days, and bulk production runs 25 to 40 days after sample approval. Logo tooling sits inside that sampling window, which is why sending finished vector artwork at the start of the project can save an entire round of sampling. If you are still at specification stage, the private label down jacket manufacturing guide covers the wider project plan before you commit to a logo method.
Why Down-Filled Panels Change How a Logo Is Made
A down jacket is a three-dimensional, low-density surface. The face fabric sits on top of a trapped air layer, and that air layer is held in place by baffles and stitch lines. Almost every logo problem on down jackets comes from this one fact: the surface underneath the decoration is not solid.
Three effects drive the manufacturing decisions.
Compression and loft loss. Techniques that press heat and pressure into the panel, such as heat transfer at high temperature, flatten the down cluster structure directly beneath the decoration. If the flattened zone is large and sits over a main warm cell, the jacket loses measurable warmth in exactly the place the eye is drawn to. Factories control this by limiting press time and temperature and by choosing decoration positions that fall on seam lines or on narrower baffles rather than over the widest warm cell.
Down migration through stitch perforations. Embroidery punches a needle through the face fabric hundreds or thousands of times. Every puncture is a potential leak path for fine down fibres. On a tightly woven down-proof shell the risk is low, but on lighter 20D and 15D shells the stitch density and underlay must be tuned, and the needle size reduced, otherwise you will find down quills along the stitch line after a few weeks of wear. This is the same down-proof principle that governs shell selection and is covered in more depth in our notes on fill power and down quality.
Puffing under the decoration. Because the panel moves, registration on an assembled down jacket is harder than on a flat cotton tee. Logos applied to flat cut panels before filling hold registration far better than logos applied to finished, filled garments. That single sequencing decision determines whether you get a clean 1 mm edge or a wavy outline.
[IMAGE_PLACEHOLDER: Studio photograph of three down jacket chest panels side by side under raking light, showing an embroidered logo on a quilted baffle, a matte heat transfer logo, and a raised 3D silicone logo, with a small ruler showing scale. Neutral grey background, no text overlays.]
The Four Decoration Techniques Compared
The comparison below reflects how each technique performs in real down jacket production, not how it performs on a flat cotton garment. The durability column refers to a standard 30 wash domestic test at 30 degrees Celsius. Brands that compare techniques on a plain fabric swatch usually pick the wrong one.
Decoration is also only one layer of a brand system. If you are still deciding how the logo relates to labels, hardware and packaging, our overview of branding options for custom down jackets maps the full set of brand touchpoints before you lock in a single technique.
| Technique | Best Position | Setup Cost | Cost per Piece | Durability on Down | Breaks Down When |
|---|---|---|---|---|---|
| Embroidery | Chest, sleeve, back yoke | Low, stitch file only | Low to medium | Excellent, 30+ washes | Logo has fine detail under 1.5 mm or dense fill under the block |
| Heat transfer | Chest, sleeve, small marks | Low to medium, print plate | Low | Good, 20 to 30 washes | Applied over a seam, coating or stretch zone |
| Screen printing | Large front and back prints | Medium, one screen per colour | Very low at volume | Good on flat panels, fair on coated shells | Print crosses baffle lines or needs high opacity on black |
| 3D silicone / rubber | Chest badge, sleeve, hem | High, mould required | Medium to high | Excellent, 40+ washes | Quantity is low, so mould cost cannot be absorbed |
Choose embroidery when
You want a premium, tactile mark on chest or sleeve positions, your artwork is at least 40 mm wide with strokes above 1.5 mm, and your shell is a down-proof woven rather than an ultralight 15D.
Choose heat transfer when
You need full colour, gradients or photographic detail on a small to medium mark, and the position falls on a flat single-layer zone away from seams and coatings.
Choose screen printing when
You are printing large graphics across the back or front at higher volumes, colour count is limited, and the print area can be flattened on a cut panel before filling.
Choose 3D silicone when
You want a raised, architectural badge that reads as hardware, you are comfortable with mould cost, and your run is large enough to spread that cost across the order.
Embroidery on Down Jackets: Manufacturing Rules That Protect Loft
Embroidery is the default premium choice because it is permanent, it ages with the garment, and it needs no adhesive. On a down jacket it requires four specific manufacturing controls that do not apply to a flat cotton shirt.
Stitch count control. A dense, high-stitch logo acts like a small rigid plate. On a lofted panel that plate fights the surrounding fabric and produces a puckered halo. We keep typical chest logos in the 4,000 to 9,000 stitch range and use a lighter underlay than we would on fleece or cotton. If a design needs 15,000 stitches, it usually belongs on a sleeve or a back yoke where the panel is flatter and larger.
Backing selection. A cut-away backing stabilises the stitches but adds a stiff layer inside the garment, which is felt immediately on a lightweight down jacket. A tear-away or a soft fusible is usually the better call. For a logo placed directly over a baffle channel, we often add a small internal fabric strip to give the needle a stable substrate without adding bulk.
Needle and thread specification. A 65/9 or 70/10 needle with a bonded polyester thread at the correct tension minimises perforation size. Thread colour matching matters more than brands expect on glossy shells, because a slight mismatch reads as a dirty mark under retail lighting.
Panel stability. Embroidering a filled jacket is possible, but the hoop pressure compresses the down locally. Wherever the design allows, we embroider the cut panel before filling and before the baffle is closed. That produces a flatter, sharper result and protects the down from hoop crush.
Heat Transfer and Screen Printing: Where They Win and Where They Fail
Heat transfer and screen printing solve different problems, and brands often confuse them because both are described as printing.
Heat transfer is a carrier film that is pressed onto the fabric with heat and pressure. It handles full colour, gradients and fine lettering that embroidery cannot reproduce, which makes it the standard choice for small chest marks and detailed typography. Its weakness on down jackets is the press itself. High temperature plus pressure compresses the down beneath the film, and if the mark is applied over a seam or over a coated shell, the edges lift after a few washes. The manufacturing controls are: keep the decoration zone flat and single layer, keep press temperature and dwell within the film supplier tolerance, apply before filling where possible, and always test adhesion on the actual shell rather than on a stock swatch.
Screen printing is a wet ink process that is cured after application. It is the most economical option for large graphics at volume because the screen cost is fixed and the per unit ink cost is low. On down jackets the limiting factor is the surface. Coated and calendered down-proof shells have low surface energy, so ink adhesion is weaker than on a plain woven. Prints that cross baffle lines also crack along the stitch line because the panel flexes there. The workable approach is to print on flat cut panels, keep the print inside a single baffle zone or span it deliberately with a flexible ink, and add a low-cure additive when the shell demands it.
Both techniques share one hard rule: the shell finish must be tested. DWR treatments, silicone softeners and PU coatings all change how ink and film behave. A five-minute adhesion test on your actual shell fabric prevents a lost production run. Fabric specification is covered in detail in our guide to custom fabric selection for jacket brands.
3D Silicone and Rubber Branding: Tooling, Cost and Durability
A 3D silicone or rubber logo is a moulded badge, either applied as a raised element bonded to the shell or produced as a moulded patch that is sewn on. It is the technique that most reliably reads as hardware from three metres away, which is why outdoor and streetwear brands use it for chest badges and sleeve marks.
The manufacturing reality is tooling. A mould is cut to your artwork, and that mould is a fixed one-time cost independent of order quantity. Once the mould exists, the per unit cost is moderate and stable. This is the opposite of embroidery, where the setup is nearly free and the per unit cost scales with stitch count.
Four production points matter:
- Mould lead time. Expect mould production to add several working days to the sampling window, so silicone artwork should be confirmed first if the project is time-critical.
- Wall thickness and relief. Very thin or very tall reliefs tear or slump. We specify relief depth against the moulded area size rather than to a fixed number.
- Bonding surface. A raised silicone element bonded to a coated shell needs a primer or a mechanical key. On a stitch-secured moulded patch the issue disappears.
- Colour matching. Pantone matching is possible in silicone but has a wider tolerance than textile dyeing, so treat it as a near match rather than an exact match.
Durability is the strongest argument for silicone. A correctly bonded or stitched 3D badge routinely survives 40 or more domestic washes, and it does not fade the way printed ink can. For brands building a recognisable signature mark across multiple seasons, a mould that is reused every season is usually cheaper over three years than re-cutting transfers every drop. This is the same long-run logic that drives luxury down jacket programs, where a consistent hardware-style mark is part of the product identity.
Durability Testing and QC Protocol for Logos
Logo quality is verified, not assumed. Our standard inspection protocol for decorated down jackets runs five checks, and the results are recorded against the approved sample.
- Wash durability. A decorated sample is washed 30 times at 30 degrees Celsius with a standard detergent, then dried and inspected for adhesion loss, edge lift, cracking, colour shift and stitch distortion.
- Abrasion and flex. The decoration is rubbed and flexed to simulate backpack straps and seat belts, which is where transfers fail first.
- Peel and bond strength. Applied marks are peeled at the edge to confirm the bond is stronger than the film or ink cohesive strength.
- Down leak check. Embroidered zones are inspected under light for fibre migration through perforations after washing.
- Registration and placement. Each decoration is measured against the pattern marker, with a tolerance agreed at sampling, typically a few millimetres on chest positions.
These checks run on the pre-production sample and again during bulk with the standard AQL inspection. The same discipline applies to the rest of the garment, and the full inspection framework is set out in our down jacket quality control checklist. Our quality system operates under ISO 9001, and our facilities are BSCI audited, with RDS and OEKO-TEX documentation available for down and fabric compliance on request.
Cost Model: Fixed Setup, Variable Unit Cost and Break-Even
Logo cost behaves differently from every other cost line in a down jacket. It splits into a fixed component that does not change with quantity and a variable component that does. Choosing the wrong technique is usually a mistake about which of the two dominates at your volume, not a mistake about quality.
| Technique | Fixed Component | Variable Component | Behaviour as Volume Grows | Best Volume Zone |
|---|---|---|---|---|
| Embroidery | Stitch file and machine programming, negligible | Machine minutes, driven by stitch count and logo size | Falls slowly, one garment decorated at a time | Any volume, strongest at 50 to 500 pieces |
| Heat transfer | Print plate or screen setup, moderate | Material and press time per piece, low | Falls quickly once setup is absorbed | Small marks at any volume |
| Screen printing | One screen per colour, moderate | Ink and cure time, very low | Falls fastest per colour count | Large graphics from a few hundred pieces upward |
| 3D silicone / rubber | Mould tooling, highest of the four | Moulding and attachment per piece, moderate | Improves steeply, and improves again when reused across seasons | Larger runs and ongoing seasonal programs |
The break-even question is simple to frame. If the fixed setup for technique A is higher than technique B, but the per piece cost is lower, then there is a quantity above which A becomes cheaper in total. That quantity is the break-even point, and it depends on your own artwork rather than on a generic table, so we calculate it from your actual logo and quantity during quoting.
Two practical consequences follow. First, if your first drop is intentionally small at 50 pieces per style, favour the techniques with low fixed cost and accept a slightly higher unit cost, because you are buying flexibility rather than scale. Second, if the same logo will run across several seasons and colourways, the high fixed cost techniques change character completely: a mould or a screen set that is reused four times costs a quarter as much per season.
Payment and sampling follow our standard terms: sample fees run from 50 to 200 US dollars depending on complexity and are deductible from the bulk order, and payment terms are 30 percent deposit with 70 percent balance. Decoration tooling is quoted separately and clearly so there is no ambiguity at the invoice stage.
Cost should always be read together with the wider production plan. You can browse our down jacket manufacturing guides for the surrounding stages of a program, from fabric choice through to final inspection, so that the decoration line is evaluated in context rather than in isolation.
Production Sequencing: When the Logo Goes On the Jacket
Sequencing is the single decision that most affects logo quality on down jackets, and it is rarely discussed by brands at the quoting stage. The order of operations is fixed for each technique.
Artwork Lock
Vector artwork, placement marker and colour references confirmed before sampling starts.
Panel Cutting and Marking
Decoration zones are marked on the flat cut panels, not guessed on the finished shell.
Decorate Flat Panels
Printing, transfers and the majority of embroidery are applied while the panel is flat and unfilled.
Baffle Construction and Filling
Channels are sewn and filled. Pre-decorated panels are protected through this stage.
Post-Assembly Decoration
Silicone badges, sleeve embroidery and any position that must sit across a seam are applied now.
Inspection and Loft Recovery
Decorated zones are inspected, and any compressed down is allowed to recover before final packing.
Logo work adds no extra lead time when it is scheduled inside sampling and follows the standard 7 to 14 day sample and 25 to 40 day bulk window.
Decoration is applied to a specific garment construction, so the finished result should be reviewed against the base style. You can see the outerwear constructions we produce in the product catalogue and match the decoration plan to the style you are developing.
Logo Placement Engineering for Baffled Panels
Placement is a construction decision, not a graphic decision. A chest logo that looks correctly positioned on a flat technical drawing can sit wrong once the panel is filled, because the baffle geometry changes where the eye reads the centre line.
- Align to the baffle, not only to the seam. Horizontal placement should be checked against the baffle line as well as the shoulder seam, because the baffle line dominates the visual grid of the finished jacket.
- Keep large blocks off the widest warm cell. A big embroidery block or a print over the main chest cell flattens the most visible part of the loft. Narrower baffles or seam crossings distribute the effect.
- Respect the zip and storm flap. Marks centred against a flap read off-centre when the jacket is worn open. Most brands are better served by aligning to the inner edge of the flap.
- Plan sleeve marks around articulation. Sleeve decoration should sit above or below the elbow articulation point so that it does not crease in wear.
- Set a measurement tolerance. Agree the acceptable placement tolerance at sampling and repeat it on the bulk inspection report, so there is a single objective standard for the whole run.
Hardware branding follows the same logic. Zipper pulls, snap caps and cord ends are part of the visual system and are specified alongside the logo rather than after it. Our overview of custom zippers for private label jackets covers how hardware choices interact with decoration, and our notes on custom labels for down jackets explain how the interior label set should be planned to match the exterior mark.
[IMAGE_PLACEHOLDER][IMAGE_PLACEHOLDER: Close-up factory bench shot showing a flat cut down jacket front panel with a printed logo, a stitch file displayed on a monitor beside an embroidery head, and a small moulded silicone badge resting on the panel. Clean workshop lighting, no people, no text overlays.]
Common Logo Manufacturing Defects and How to Prevent Them
Almost all logo defects on down jackets fall into six recurring categories. Each one has a known cause and a known countermeasure at production planning stage.
Loft collapse
- Cause: heavy press or dense embroidery over a wide warm cell
- Fix: restrict press time and temperature, reposition the mark
Edge lift on transfers
- Cause: decoration across a seam or a low energy coated shell
- Fix: keep the mark on a flat zone, test adhesion on the real shell
Registration drift
- Cause: decorating a filled moving panel instead of a flat panel
- Fix: apply before filling wherever the technique allows
Colour shift
- Cause: approval from a paper proof rather than a physical strike-off
- Fix: approve every colour from a real strike-off on the real fabric
Down leaking at stitches
- Cause: high stitch density on a lightweight shell
- Fix: reduce needle size, tune underlay, add internal stabiliser
Silicone slump or tear
- Cause: mould relief too tall or too thin for the badge area
- Fix: specify relief depth against moulded area at tooling stage
A written decoration specification that includes the technique, position, measured tolerance, colour reference and test method prevents all six. It also makes the bulk inspection objective, because the inspector compares against a document rather than an opinion. Brands that treat the decoration spec as part of the tech pack see markedly fewer logo claims at retail.
Frequently Asked Questions
Which logo technique is best for a down jacket?
Embroidery is the safest default for chest and sleeve marks because it is permanent and ages with the garment. Choose heat transfer for fine detail and full colour, screen printing for large graphics at volume, and 3D silicone when you want a raised hardware-style badge and can absorb the mould cost.
Can a logo be embroidered on a down jacket without damaging the loft?
Yes, with two controls. Keep stitch counts moderate so the logo does not form a rigid plate, and embroider the cut panel before filling wherever the position allows. Both measures protect the down structure underneath.
Does a custom logo increase the minimum order quantity?
No. Our MOQ is 50 pieces per style, and a logo does not raise it. What changes is not the minimum but the cost structure, because techniques with higher fixed tooling cost become more attractive at larger quantities rather than being required.
How long does logo development add to sampling?
When artwork is supplied as clean vector files at project start, logo trials sit inside the standard 7 to 14 day sampling window. Techniques requiring a mould add several working days, so silicone artwork should be confirmed first.
What files should I send for a logo quote?
Send vector artwork such as AI, EPS, PDF or SVG, plus the measured logo size, the placement position on the flat pattern, the Pantone references, and the intended technique. We also need to know the shell fabric so adhesion and stability can be assessed.
Can I combine several logo techniques on one jacket?
Yes, and it is common. A typical combination is a moulded badge on the chest with embroidery on the sleeve, plus a woven main label and care label inside. Combined decoration is planned as one workflow and adds very little production time.
Custom logo down jacket manufacturing is a decision about technique, sequencing and tooling rather than a purely graphic choice. Embroidery gives durability, heat transfer gives detail, screen printing gives scale, and 3D silicone gives hardware presence. The right answer depends on your artwork, your quantity and where the mark sits on the baffle grid.
Ginwen Wear produces custom down jackets, puffer jackets and padded outerwear on an OEM and ODM basis with private label branding, at 50 pieces per style. If you want a technique recommendation for a specific logo, send us your artwork and shell specification and we will quote the decoration cost and break-even quantity alongside the garment. You can submit your requirements with your artwork and shell specification for a reply within one business day, and we will return a technique recommendation, a decoration cost and a break-even quantity for your order.